
 James Montemagno
b117c7b1c1
Initial Commit
James Montemagno
b117c7b1c1
Initial Commit
|
11 vuotta sitten | |
|---|---|---|
| .. | ||
| Images | 11 vuotta sitten | |
| readme.md | 11 vuotta sitten | |
| readme_vs.md | 11 vuotta sitten | |
readme.md
Hello, Android Multiscreen Quickstart
In the walkthrough part of this guide we’ll add a second screen to our Phoneword application to keep track of the history of numbers called using our app. The final application will have a second screen that displays the call history, as illustrated by the following screenshots:
In the accompanying Deep Dive, we’ll review what we’ve built and discuss architecture, navigation, and other new Android concepts that we encounter along the way.
Let’s get started!
Requirements
Because this guide picks up where Hello, Android leaves off, it requires completion of the Hello, Android Quickstart. If you would like to jump directly into the walkthrough below, you can download the completed version of Phoneword (from the Hello, Android Quickstart) and use it to start the walkthrough.
Walkthrough
In this walkthrough we’ll add a Call History screen to our Phoneword application.
<ol>
<li>
<p>
Let’s open the <b>Phoneword</b> project in Xamarin Studio:
<p>
<p><a href="Images/xs/01-phoneword.png" class=" fancybox"><img src="Images/xs/01-phoneword.png"></a></p>
</li>
<li>
<p>
Let’s start by editing the user interface. Open the <b>Main.axml</b> file from the
<span class="uiitem">Solution Pad</span>:
</p>
<p><a href="Images/xs/02-main-axml.png" class=" fancybox"><img src="Images/xs/02-main-axml.png"></a></p>
</li>
<li>
<p>
From the <span class="uiitem">Toolbox</span>, drag a <span class="uiitem">Button</span> onto the design
surface and place it below the <span class="uiitem">Call</span> button:
</p>
<p><a href="Images/xs/03-new-button.png" class=" fancybox"><img src="Images/xs/03-new-button.png"></a></p>
</li>
<li>
<p>
In the <span class="uiitem">Properties Pad</span>, change the button <span class="uiitem">Id</span>
to <code>@+id/CallHistoryButton</code>:
</p>
<p><a href="Images/xs/04-call-history-button.png" class=" fancybox"><img src="Images/xs/04-call-history-button.png"></a></p>
</li>
<li>
<p>
Let’s set the <span class="uiitem">Text</span> property of the button to
<code>@string/callHistory</code>. The Android Designer will interpret this literally, but we’re going
to make a few changes so that the button's text shows up correctly:
</p>
<p><a href="Images/xs/05-call-history-string.png" class=" fancybox"><img src="Images/xs/05-call-history-string.png"></a></p>
</li>
<li>
<p>
Expand the values node under the <span class="uiitem">Resources</span> folder in the
<span class="uiitem">Solution Pad</span> and double-click the string resources file,
<b>Strings.xml</b>:
</p>
<p><a href="Images/xs/06-strings-resources-file.png" class=" fancybox"><img src="Images/xs/06-strings-resources-file.png"></a></p>
</li>
<li>
<p>Add the <code>callHistory</code> string name and value to the <b>Strings.xml</b> file and save it:</p>
<pre><code class=" syntax brush-C#"><?xml version="1.0" encoding="utf-8">
<resources>
<string name="callHistory">Call History</string>
</resources>
<p>The <span class="uiitem">Call History</span> button text should update to reflect the new string value:</p>
<p><a href="Images/xs/07-new-string-value.png" class=" fancybox"><img src="Images/xs/07-new-string-value.png"></a></p>
</li>
<li>
<p>
With the <span class="uiitem">Call History</span> button selected on the design surface, open the
<span class="uiitem">Behavior</span> tab in the <span class="uiitem">Properties Pad</span> and
double-click the <span class="uiitem">Enabled</span> checkbox to disable the button.
This will cause the button to become darker on the design surface:
</p>
<p><a href="Images/xs/08-behavior.png" class=" fancybox"><img src="Images/xs/08-behavior.png"></a></p>
</li>
<li>
<p>
Let’s create a second Activity to power the second screen. In the <span class="uiitem">Solution Pad</span>,
click the gray gear icon next to the <b>Phoneword</b> project and choose
<span class="uiitem">Add > New File...</span>:
</p>
<p><a href="Images/xs/09-add-new-file.png" class=" fancybox"><img src="Images/xs/09-add-new-file.png"></a></p>
</li>
<li>
<p>
From the <span class="uiitem">New File</span> dialog, choose <span class="uiitem">Android > Activity</span>
and name the Activity <code>CallHistoryActivity</code>:
</p>
<p><a href="Images/xs/10-call-history-activity.png" class=" fancybox"><img src="Images/xs/10-call-history-activity.png"></a></p>
</li>
<li>
<p>Replace the template code in <code>CallHistoryActivity</code> with the following:</p>
<pre><code class=" syntax brush-C#">using System;
using System.Collections.Generic; using Android.App; using Android.OS; using Android.Widget; namespace Phoneword {
[Activity(Label = "@string/callHistory")]
public class CallHistoryActivity : ListActivity
{
    protected override void OnCreate(Bundle bundle)
    {
        base.OnCreate(bundle);
        // Create your application here
        var phoneNumbers = Intent.Extras.GetStringArrayList("phone_numbers") ?? new string[0];
        this.ListAdapter = new ArrayAdapter<string>(this, Android.Resource.Layout.SimpleListItem1, phoneNumbers);
    }
}
}
        <p>
            In this class, we're creating a <code>ListActivity</code> and populating it programmatically, so we don’t
            need to create a new layout file for this Activity. We’ll discuss this in more detail in the
            <a href="http://developer.xamarin.com/guides/android/getting_started/hello,android_multiscreen/hello,android_multiscreen_deepdive/">
                Hello, Android Multiscreen Deep Dive
            </a>.
        </p>
    </li>
    <li>
        <p>
            In our app, we’re going to collect phone numbers that the user has dialed on the first screen and then pass
            them to the second screen. We’re going to store the phone numbers as a list of strings. To support lists, add
            the following <code>using</code> directive to the top of the <code>MainActivity</code> class:
        </p>
        <pre><code class=" syntax brush-C#">using System.Collections.Generic;</code></pre>
        <p>Next, let’s create an empty list that we can fill with phone numbers. Our <code>MainActivity</code> class will look like this:</p>
        <pre><code class=" syntax brush-C#">[Activity(Label = "Phoneword", MainLauncher = true, Icon = "@drawable/icon")]
public class MainActivity : Activity {
static readonly List<string> phoneNumbers = new List<string>();
...// OnCreate, etc.
}
</li>
<li>
<p>
Let’s wire up the <span class="uiitem">Call History</span> button. In the <code>MainActivity</code> class,
add the following code to register and wire up the button:
</p>
<pre><code class=" syntax brush-C#">Button callHistoryButton = FindViewById<Button> (Resource.Id.CallHistoryButton);
callHistoryButton.Click += (sender, e) => {
var intent = new Intent(this, typeof(CallHistoryActivity));
intent.PutStringArrayListExtra("phone_numbers", phoneNumbers);
StartActivity(intent);
};
    </li>
    <li>
        <p>
            We want to extend the <span class="uiitem">Call</span> button's functionality to add a phone number to the
            list of numbers and enable the <span class="uiitem">Call History</span> button whenever the user dials a new
            number. Let’s change the code of the <em>Neutral Button</em> in our Alert Dialog to reflect that:
        </p>
        <pre><code class=" syntax brush-C#">callDialog.SetNeutralButton("Call", delegate
{
// add dialed number to list of called numbers.
phoneNumbers.Add(translatedNumber);
// enable the Call History button
callHistoryButton.Enabled = true;
// Create intent to dial phone
var callIntent = new Intent(Intent.ActionCall);
callIntent.SetData(Android.Net.Uri.Parse("tel:" + translatedNumber));
StartActivity(callIntent);
});
<p>Save and build the application to make sure there are no errors.</p>
</li>
<li>
<p>
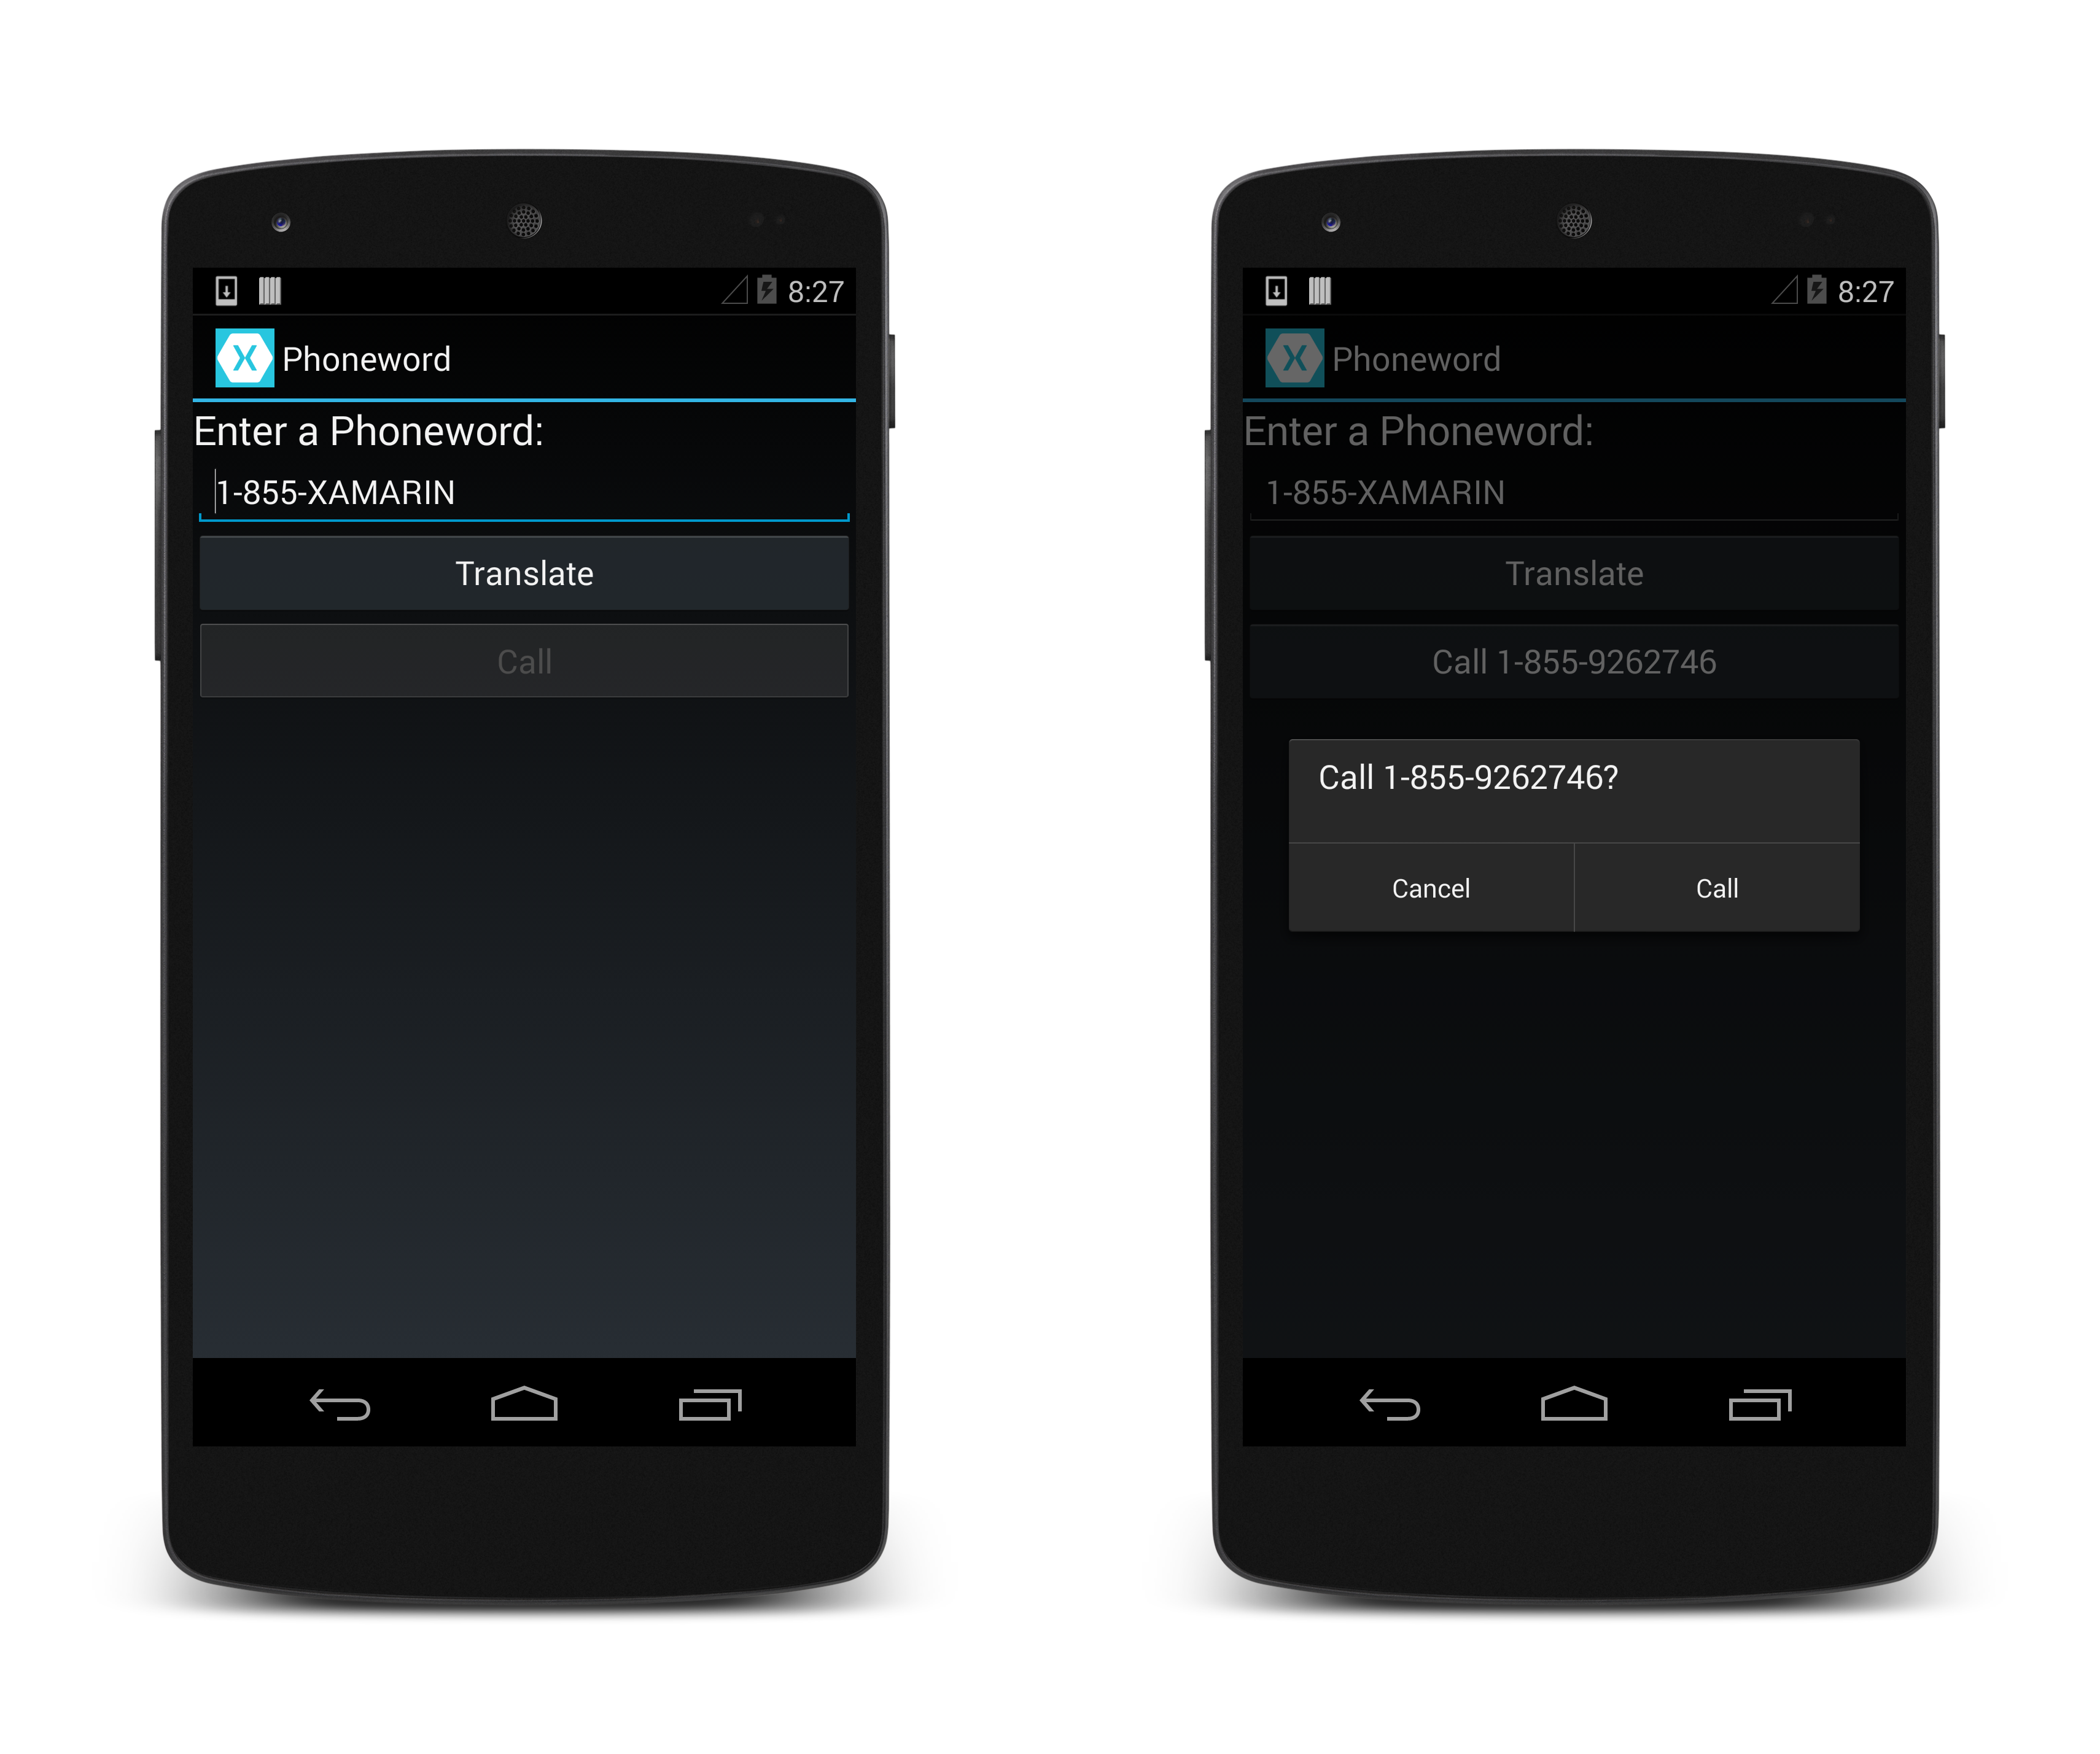
Deploy the application to an emulator or device. The following screenshots illustrate the
<span class="uiitem">Phoneword</span> application running in the Xamarin Android Player:
</p>
<p><a href="Images/xs/phoneword-xap.png" class=" fancybox"><img src="Images/xs/phoneword-xap.png"></a></p>
</li>
</ol>
Congratulations on completing your first multi-screen Xamarin.Android application! Now it’s time to dissect the tools and skills we just learned in the Hello, Android Multiscreen Deep Dive.